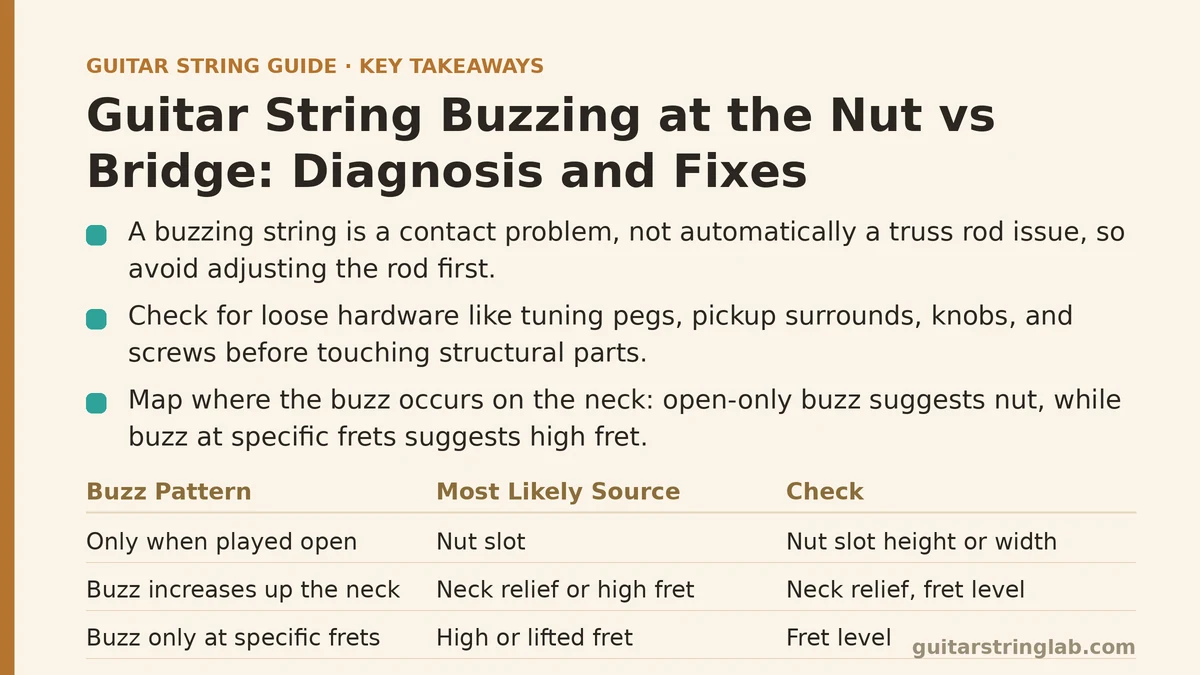
A buzzing string is not automatically a truss rod problem. That is the most common misdiagnosis in guitar setup, and acting on it too early — turning the rod before checking anything else — is how a small, ten-minute fix turns into a full setup. A buzz is a contact problem. The string is touching something it shouldn’t during part of its vibration, or something loose is resonating in sympathy with it. Your job is not to guess which; it’s to narrow down where.
Here is a sequential method. Work through it in order, because each step eliminates a category of causes and makes the next step more conclusive.
Step 1: Confirm the Buzz Is Coming From a String, Not a Loose Part
Before touching anything structural, rule out hardware. A surprising share of reports of “string buzz” turn out to be a loose component vibrating against the guitar body.
Pluck each string open, one at a time, and listen. Then do the following:
- Hold the tuning peg buttons firmly while plucking the offending string. If the buzz disappears, the issue is a loose or worn tuning machine, not the string.
- Press a finger against the bridge pickup surround and the control knobs while plucking.
- Check the output jack nut, strap buttons, and any pickguard screws. A single loose screw in a pickguard can produce a buzz that sounds like it originates from the neck.
- On acoustic guitars, check the battery bag, the endpin jack, and any internal wiring or pickup element.
If nothing external silences the buzz, move on. If something does, tighten or reseat it and you’re done — no setup required.
Step 2: Map Where on the Neck the Buzz Appears
The location of the buzz in terms of fret position is your single most useful clue. Play a chromatic run on the affected string from the open note up to the twelfth fret and note exactly where the buzz starts and stops.
| Buzz Pattern | Most Likely Source |
|---|---|
| Only when the string is played open | Nut slot |
| Open note buzzes, fretted notes are clean | Nut slot height or width |
| Buzz increases as you move up the neck | Neck relief or high fret |
| Buzz only at one or two specific frets | A high or lifted fret |
| Buzz mainly on open low E and A, disappears when fretted | Nut slot cut too low on wound strings |
| Buzz strongest at the bridge end, present everywhere | Saddle, saddle slot, or bridge hardware |
A buzz that appears only on the open string and vanishes the moment you fret any note is nearly always a nut issue. A buzz that appears regardless of fretting, at a consistent volume, usually points to the bridge end or a loose component.
Step 3: Test the Nut With a Fret and a Tap
Two quick physical checks isolate the nut.
The third-fret tap test. Fret the string at the third fret. While holding it there, tap the string down onto the first fret with your other hand and look at the gap between the string and the first fret. There should be a small but visible gap — roughly the thickness of a business card or a thin pick (around 0.25–0.5 mm). If the string rests on or nearly touches the first fret with no clearance, the nut slot is cut too low. That will buzz on the open note and nowhere else.
The slot width check. With the string at pitch, try to move it side to side within its nut slot. A properly sized slot holds the string with minimal lateral play. If the string shifts noticeably, the slot is too wide, and the string is rattling inside the slot itself rather than sitting on a clean bearing point. This produces a thin, sitar-like buzz on the open string.
The string gauge check. If you recently moved from a 0.009 set to a 0.010 or heavier set without touching the nut, the wider strings may now be sitting on top of slots cut for thinner strings rather than seated in them. That changes both the break angle and the bearing point, and it commonly introduces open-string buzz where none existed before.
Step 4: Test the Bridge End With the Same Logic
If the nut checks out, shift your attention to where the string meets the saddle.
Feel the saddle slot. Run a fingernail along the saddle where each string crosses. A worn saddle develops grooves over time, and a string sitting in a groove that’s deeper than its own diameter can rattle against the groove walls. This is common on older acoustic saddles, which are typically made of softer materials like bone or plastic.
Check the break angle. The angle the string makes as it leaves the saddle toward the bridge pins or tailpiece matters. A shallow break angle — under roughly 10 to 15 degrees — reduces downward pressure on the saddle, and the string can buzz against the saddle top. On acoustic guitars, this often happens when the saddle has been sanded down too far or the bridge pins are worn.
Inspect for a flat or chipped saddle top. A saddle that has been filed flat across its width, or chipped at the string contact point, gives the string a broad, imprecise bearing surface instead of a defined point. That leads to a buzz that is present at all fretting positions.
On electrics, check the saddle height screws. Individual bridge saddles on a Strat-style bridge sit on two small height screws. If one screw has backed out or the saddle is tilted, the string can contact the saddle edge at an angle, producing a buzz that’s often mistaken for fret rattle.
Step 5: Rule Out Relief and Fret Problems Before Adjusting Anything
Only after the nut and bridge have been cleared should you look at neck relief and frets. This order matters because adjusting relief to chase a nut buzz will throw off your action without fixing anything.
Check relief. Fret the low E string at the first fret and simultaneously at the fret where the neck meets the body — typically the fourteenth or fifteenth. Look at the gap between the string and the seventh or eighth fret. A typical target is roughly 0.25 mm, or about the thickness of a thin business card. If there is no gap at all, the neck is back-bowed and the strings are likely contacting frets along their entire length. If the gap is excessive, the neck is over-bowed and action is unnecessarily high, though this rarely causes buzz on its own.
Check for high frets. Fret each string at every fret position from the first to the last and listen for a buzz that appears at one specific fret and disappears at the next. A single buzzing fret is a high fret, not a nut or bridge problem. A fret rocker — a short straightedge that spans three frets — will confirm it. High frets need to be leveled and recrowned, which is a job for a repair tech unless you have the tools and the experience.
Check for a worn or loose fret. A fret that has lifted slightly from the fretboard will buzz at that position. Press down on the fret ends with a fingernail and look for any movement.
Step 6: Match the Fix to the Diagnosis
Once you’ve isolated the source, apply the corresponding fix. Do not skip straight to the truss rod.
If the nut slot is too low: The proper fix is to fill the slot and recut it, or replace the nut. A quick shim under the nut can raise the entire nut, but that raises every string and changes the feel. Filling a single slot with a mix of baking soda and cyanoacrylate is a common field repair, but it’s temporary and best treated as a stopgap until a proper nut is cut. Nut files are gauged to string size; using the right file matters, because an oversized file widens the slot.
If the nut slot is too wide: Same path — fill and recut, or replace the nut. Do not try to fix a wide slot by wrapping the string, which only masks the problem and can shift tuning stability.
If the saddle slot is grooved: On an acoustic, the saddle can often be removed and the groove smoothed flat, or the saddle replaced. Saddles are relatively inexpensive parts — a bone saddle typically runs in the range of a modest one-time cost relative to a full setup — and replacing one is a reasonable DIY job if you replicate the original height and compensate for intonation.
If the break angle is too shallow: On acoustic guitars, a taller saddle or a set of bridge pins with a slot modification can restore the angle. On electrics with a tune-o-matic or similar bridge, lowering the tailpiece slightly increases the break angle over the saddles.
If a saddle height screw has backed out: Set the saddle level and confirm both screws contact the bridge plate evenly. A saddle sitting on only one screw is unstable and will buzz.
If relief is wrong: Adjust the truss rod in small increments — an eighth of a turn at a time — and let the neck settle for a few minutes between adjustments. Do not force it. If the rod feels like it’s not moving, stop and take the guitar to a tech.
If a fret is high: Level and recrown, or have it done. This is not a fix to attempt with a file and hope.
What to Do Next
Pick up the guitar and run Steps 1 through 3 right now — loose hardware check, fret-position map, and the third-fret tap test. Those three steps take under five minutes and will tell you whether you’re dealing with a nut issue, a bridge issue, or something that needs fret work. Only reach for the truss rod wrench if Steps 1 through 4 have all come back clean and the buzz pattern points at relief.
If the diagnosis lands on a high fret, a badly cut nut, or a back-bowed neck that won’t respond to careful adjustment, that’s your signal to hand it to a repair tech rather than keep turning things. A setup that fixes the real cause costs far less than a repair bill for a neck that was forced past its limit.
Related guides: How to Measure Guitar String Action, Installing a GraphTech Nut, and Step-by-Step DIY Guitar Setup for Beginners.