Say you are trying to fix a guitar that keeps pinging and going sharp every time you bend a note, or one where the open strings sound noticeably thinner than the fretted ones. You have read that a GraphTech nut solves tuning friction and evens out the tone, so you order one for about $12 to $20, it arrives in a small bag, and then you sit there holding a shaped piece of synthetic material wondering where to start. The old nut is glued in place. You do not own nut files. You are not sure if you are supposed to hit it with a hammer.
That is the moment this guide is written for. A nut swap is one of the most approachable upgrades on an electric guitar, and with the right expectations it takes roughly 30 to 60 minutes the first time. It can also go badly if you rush the removal or skip the measuring step. Below is the process laid out against the assumptions most beginners bring to it, with the realities and corrections attached.
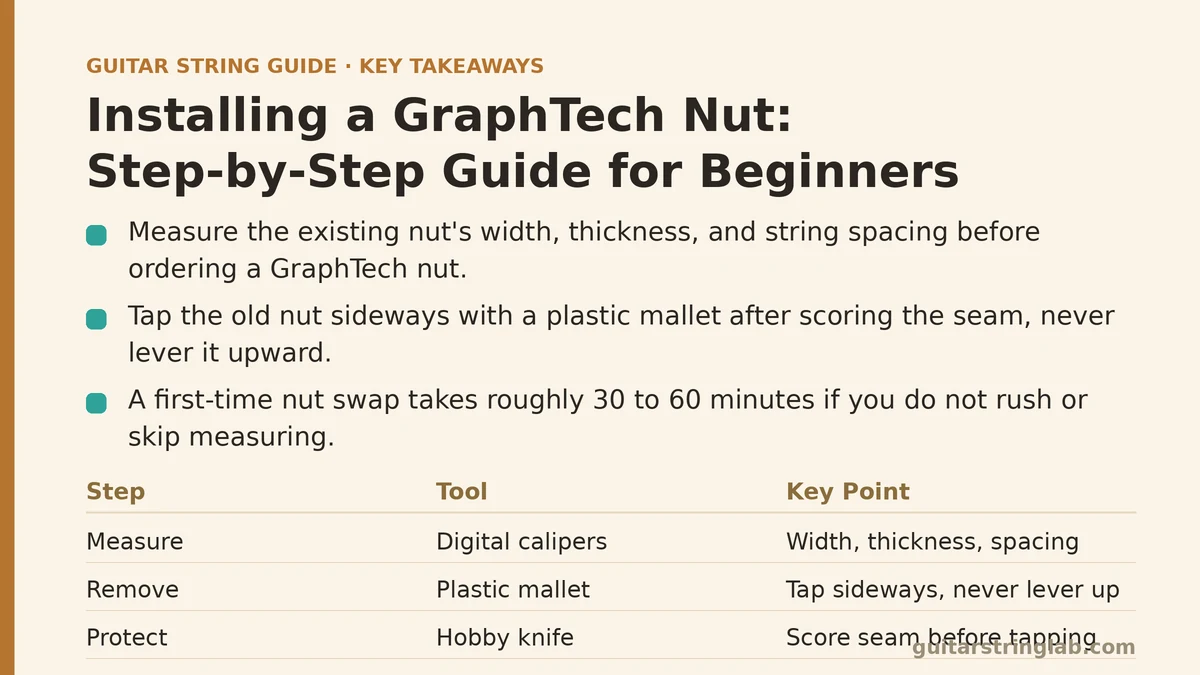
Myth: Every GraphTech Nut Is a Drop-In Replacement
The marketing around pre-slotted nuts suggests you pop the old one out and the new one clicks in with acceptable action.
Reality: GraphTech nuts come in a few different states. The pre-slotted versions are cut to a generic depth that fits a typical setup, but “typical” is doing a lot of work in that sentence. Your guitar’s nut slot has its own width, its own radius at the bottom, and its own end-to-end length. A nut that is 0.5 mm too wide will not seat, and one that is too tall will leave your strings sitting higher than they were before, throwing off intonation at the first few frets.
What to do: Before ordering, measure three things on your existing nut with digital calipers: overall width, thickness front to back, and the string spacing at both E strings. GraphTech publishes these dimensions for every model they sell, and the TUSQ line in particular has models labeled for common Fender and Gibson footprints. If your guitar is not a mainstream model, buy a slightly oversized blank and plan to sand it down.
Myth: You Can Just Tap the Old Nut Out With a Hammer
This is the step where most beginner jobs turn into a repair bill. The nut is glued, and the glue is usually a small dab of wood glue or cyanoacrylate at the bottom and sometimes against one end.
Reality: A firm sideways tap with a plastic mallet against the nut’s face, parallel to the fretboard, will usually break the glue bond cleanly. A downward tap, or a tap against a nut that has been glued along its entire base, can chip the wood of the nut slot or tear out a small piece of the headstock veneer on cheaper guitars.
What to do:
- Score the seam between the nut and the fretboard with a sharp hobby knife, running the blade along both edges of the nut.
- Support the neck so the headstock is not hanging in the air.
- Tap the nut sideways toward the low E side with a plastic mallet or the butt of a screwdriver handle wrapped in tape.
- If it will not move after two or three firm taps, apply a small amount of heat with a hair dryer for 20 to 30 seconds to soften the glue, then try again.
- Never lever the nut upward with a screwdriver. That is how fretboard chips happen.
If a small chip does come up with the nut, keep it. You can glue it back with wood glue after the new nut is fitted, and a clamp made from a small C-clamp padded with cardboard will hold it while it dries for about an hour.
Myth: The New Nut Goes In With the Same Glue You Use for Everything Else
Superglue is convenient, so it seems like the obvious choice.
Reality: Cyanoacrylate bonds fast and strong, and that is exactly the problem. If the new nut needs to come out later — and it will, eventually — you want a bond that releases with a light tap. Wood glue or a tiny dab of white craft glue is the standard choice for this reason. Two small dots on the bottom of the nut is plenty. The string tension holds the nut in place; the glue is only there to stop it sliding sideways during string changes.
What to do:
- Clean the nut slot with a small brush or a folded piece of 400-grit sandpaper to remove old glue residue.
- Dry-fit the new nut with no glue. Check that it sits flat, is flush with the fretboard end, and does not rock.
- If it rocks, the bottom of the slot is not flat, or the nut’s base is not true. Sand the nut’s base flat on a piece of 400-grit paper laid on a flat surface, checking frequently.
- Once the dry fit is good, apply two small dots of wood glue to the nut’s base and set it in place. Do not clamp it hard. Light finger pressure for 30 seconds is enough.
- Wait at least 30 minutes before stringing up, or overnight if you have the patience.
Myth: If the Slots Are Pre-Cut, the Action and Intonation Are Already Set
Pre-slotted means the slots exist. It does not mean they are correct for your guitar.
Reality: Slot depth controls string height at the nut, and string height at the nut controls how the guitar feels and intonates near the headstock. Too high and your first-position chords will feel stiff and pull sharp. Too low and open strings will buzz against the first fret. GraphTech cuts their slots conservatively — usually a touch high — so you can file them down to fit.
How to check if the slots need work:
- Press each string down at the third fret. Look at the gap between the string and the first fret. You want a gap roughly the thickness of a business card, or about 0.25 mm on the plain strings and slightly more on the wound ones.
- If the string is resting on the first fret with no visible gap, the slot is too low. The nut is unusable as-is and needs to be replaced or shimmed.
- If the gap is more than about 0.5 mm on the plain strings, the slots are too high and need to come down.
If the slots are too high: This is the step that beginners most often cannot do themselves because it requires nut files in matched gauges. A set of good nut files runs $60 to $120. Options:
- Take the guitar to a tech and ask them to cut the slots to your preferred action. Typical cost is $30 to $60.
- Buy a single file in the gauge you need most and only lower the offending slots.
- Use the string itself as a file by pulling it back and forth through the slot with light pressure. This is slow, imprecise, and can widen the slot sideways if you are not careful, but it works in a pinch on the wound strings.
Do not use a hacksaw blade or a knife. Both will ruin the slot width and you will be buying another nut.
Myth: The String Spacing Will Be Right Out of the Box
String spacing refers to the distance between each string at the nut. It affects how the guitar feels in first position, especially for fingerstyle players and anyone with larger hands.
Reality: Most pre-slotted nuts use even spacing from slot to slot, which means the gap between the wound low E and A feels tighter than the gap between the plain B and high E, because the strings themselves are different thicknesses. Some players do not notice. Others find it uncomfortable.
What to do: Compare the spacing on the new nut against the old one before installing. If the old nut felt right, measure the center-to-center distance between the high E and low E slots on both, and confirm they match within about 0.25 mm. If they do not, and you care about the feel, you may need to fill and re-cut the slots or exchange for a different model.
Myth: Once the Nut Is In, You Are Done
Installing the nut is the middle of the job, not the end.
Reality: After the nut is set and the strings are back on, you need to check three things in order: tuning stability through bends, open-string tone, and intonation at the first few frets. Any of these can reveal that the slots need a small amount of attention with a bit of graphite or a light polish.
Post-install checklist:
- Tune to pitch, then bend the G string a whole step and release. It should return to pitch immediately. If it comes back sharp, the slot is gripping. Lubricate with a pencil lead or a commercial nut lube and test again.
- Play each open string and compare it to the same note fretted at the twelfth fret. The open string should sound at least as full. If the open strings sound thin or plinky, the slots may be too shallow or not angled down toward the tuning pegs.
- Fret each string at the third fret and check for buzz against the first fret. Buzz means the slot is too low.
- Check intonation at the twelfth fret as you normally would. The nut rarely affects this, but if something feels off across the whole neck, rule it out.
Before and After: What Changes and What Does Not
| Item | Stock Nut (typical) | After GraphTech Install |
|---|---|---|
| Tuning stability through bends | Depends on slot condition; often sticky on the G and B strings | Usually improved; self-lubricating material slides more freely |
| Open-string tone | Can be uneven or slightly dull | Commonly more consistent with fretted notes |
| Action at first fret | Set at the factory, often on the high side | Set by you or your tech when cutting slots |
| Sustain on open strings | Adequate | Slight improvement reported by many players, not dramatic |
| Cost | Included with the guitar | $12–$20 for the nut, plus $0–$60 for slot cutting if you do not own files |
| Time to install | — | 30–60 minutes first time, 15–20 minutes once you have done it once |
Common Mistakes and How to Recover
- Chipped fretboard when removing the old nut. Keep the chip, glue it back with wood glue, clamp lightly for an hour. Sand flush only after it dries fully.
- New nut sits too high, strings buzz on frets 1 and 2. The slots are too shallow or the nut base is not seated flat. Re-check the base first; if that is fine, the slots need to be cut lower.
- Strings keep going sharp after bends. The slots are too tight for the string gauge. Lubricate first; if that does not fix it, the slot needs to be opened slightly with the correct gauge file.
- Open strings sound dull and dead. The slots may be angled wrong, or the string may be contacting the slot wall. Check that the string leaves the slot cleanly and travels in a straight line to its tuning peg.
What to Do Next
If your guitar has a cheap plastic nut and you are comfortable with basic hand tools, this is a reasonable beginner job. Order a GraphTech nut that matches your guitar’s measured dimensions, pick up a small plastic mallet and some 400-grit sandpaper, and budget an afternoon for your first attempt. If your slots come out too high and you do not want to buy files, stop there and hand it to a tech — you will have saved the removal and fitting labor, and they can finish the slot work for a modest fee.
If you are unsure whether your current nut is the source of your tuning problems, spend five minutes first: bend each string a whole step at the fifth fret, release, and check the tuner. Strings that come back sharp point to the nut far more often than to the tuners or the bridge. That test costs nothing and tells you whether this job is worth doing at all.
Related guides: Guitar String Buzzing at the Nut vs Bridge, How to Measure Guitar String Action, and Step-by-Step DIY Guitar Setup for Beginners.