Say you are trying to layer an acoustic track in a recording session and the standard-tuned rhythm guitar is already filling most of the frequency space. You need something that sits above it, chiming and a little chorused, without adding another full guitar’s worth of low end to fight with. This is exactly the gap Nashville tuning was built to fill, and it is why session players keep a second guitar strung this way instead of reaching for a twelve-string every time.
The problem is that most players who try it for the first time grab a standard set, tune the low four strings up an octave, and immediately snap a string or end up with a guitar that sounds thin and lifeless instead of shimmering. The tuning itself isn’t the hard part. Getting the string gauges right is. Below is the process to walk through when setting up a Nashville-tuned guitar correctly the first time.
Step 1: Understand What Nashville Tuning Actually Changes
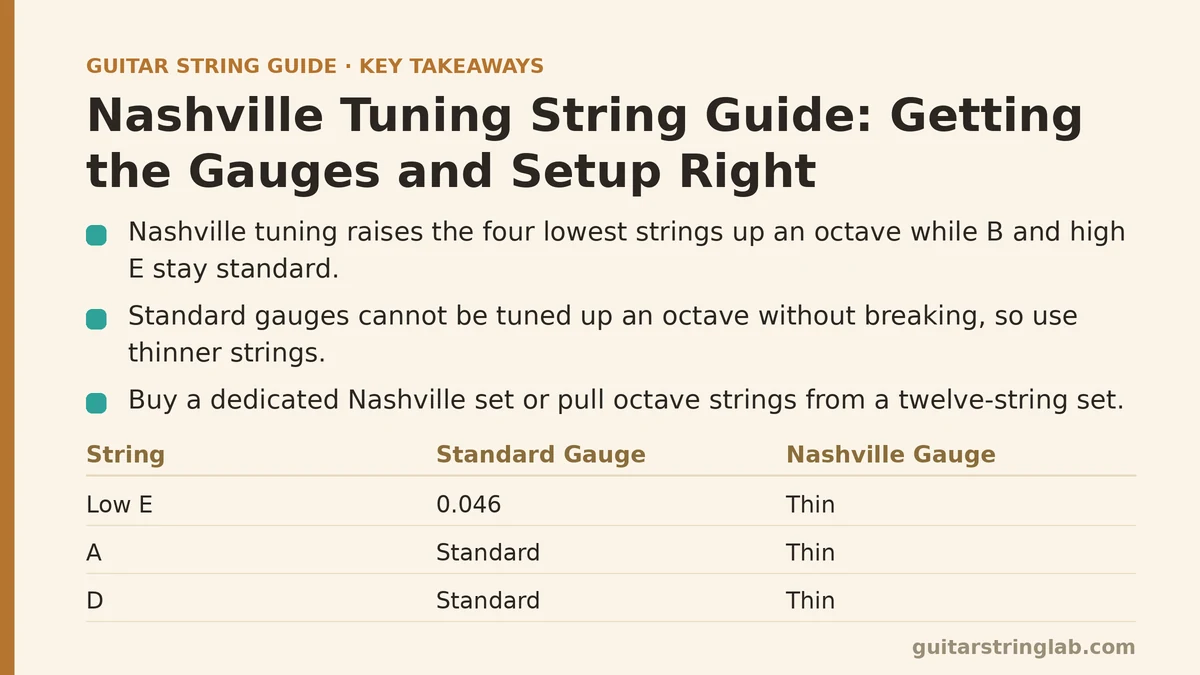
Nashville tuning, sometimes called high-strung tuning, takes the same note names as standard tuning — E A D G B E — but raises the four lowest strings (E, A, D, G) up an octave. The B and high E stay where they are. The result is a guitar that plays the same chord shapes and the same fingerings, but produces the high-octave strings of a twelve-string set instead of the full-course pairing.
That octave jump is the entire point, and it is also exactly why a standard set fails here. Strings built for standard-pitch E, A, D, and G are far too thick to be tuned up an octave. Try it with regular strings and you are asking a 0.046 low E to hit an E an octave higher than it was designed for. It will either refuse to reach pitch cleanly, or it will reach pitch under so much tension that it snaps, sometimes taking your bridge or nut with it.
So the first thing to accept is that Nashville tuning is not a tuning trick you apply to your existing set. It requires a specific set of thinner gauges built for exactly this purpose.
Step 2: Get the Right Strings for the Job
You have two practical paths here, and both work well when done correctly.
Buy a dedicated Nashville tuning set. Several manufacturers sell sets specifically labeled for this purpose, and they are the simplest option if you don’t want to think about gauge math. These sets are pre-calculated to hit proper tension at the octave-up pitches for E, A, D, and G, while leaving the B and high E at standard gauge.
Pull the high strings from a twelve-string set. This is the classic workaround, and it is what plenty of session players still do. A standard twelve-string acoustic set includes an octave string paired with each of the low four strings — those octave strings are exactly the gauges you need. Combine those four thin strings with a standard high E and B (or the matching pair from the same twelve-string set), and you have a correctly gauged Nashville set without buying anything labeled specifically for the purpose.
Either path gets you to roughly the same place. If you already own a twelve-string set for another project, pulling strings from it is the cheaper route. If you don’t, a dedicated Nashville set saves you from tracking down individual gauges.
Step 3: Know the Actual Gauges You’re Working With
To make the math concrete, here is a typical breakdown for a Nashville-tuned set built around a standard light starting point.
| String | Standard Gauge | Nashville Gauge |
|---|---|---|
| High E | 0.012 | 0.012 (unchanged) |
| B | 0.016 | 0.016 (unchanged) |
| G | 0.024w or 0.025 | 0.008–0.009 |
| D | 0.032 | 0.014–0.015 |
| A | 0.042 | 0.018–0.020 |
| Low E | 0.052 | 0.026–0.027 |
Notice the pattern: the top two strings don’t change at all, while the bottom four drop to gauges roughly a third to half of their standard thickness. That drop is what allows them to survive the octave jump under reasonable tension instead of snapping or requiring extreme tuning that damages the guitar.
If you’re buying strings individually rather than as a packaged set, these numbers are your reference point. Match them within a gauge or two and you’ll land in the right tension range.
Step 4: Check Your Guitar’s Setup Before You String Up
Nashville tuning changes the tension balance across the neck, even though total string count and rough overall tension stay in a similar range to standard tuning. Thinner strings under higher relative tension at the octave, combined with unchanged tension on the top two strings, can shift how the neck reacts compared to what it’s used to.
Before restringing, take a look at nut slot width. Nut slots cut for standard 0.046–0.052 low strings will be oversized for the 0.026–0.027 gauge Nashville equivalents, which can cause rattling or poor string seating. This usually isn’t severe enough to require immediate nut work, but if you hear buzzing or notice the string sitting loosely in its slot, that’s the cause.
Also plan on a truss rod check after the strings settle for a day or two. The tension profile is different enough from standard tuning that many guitars will want a small relief adjustment once everything stabilizes. This is normal and not a sign anything is wrong with your instrument.
Step 5: String Up and Tune Carefully
Bring the new strings up to pitch gradually rather than cranking each one straight to target in one pass. Go around the guitar two or three times, raising each string a little each round, so tension increases evenly across the neck instead of concentrating stress on whichever string you tighten first.
Tune to standard note names — the thin G string still tunes to G, just an octave higher than a standard G string would sit. A clip-on or pedal tuner set to standard tuning will read these correctly since it’s tracking pitch class, not octave. If your tuner shows octave numbers, expect the low four strings to read one octave higher than they would in standard tuning.
Give the set a few minutes to settle, then retune. Thin strings at unfamiliar tension tend to stretch and drift more in the first hour than a standard set does, so don’t judge tuning stability until they’ve had a chance to settle in.
Step 6: Know Where This Tuning Actually Shines
Nashville tuning is built for layering, not for standing alone as your only guitar part. Recorded on top of a standard-tuned rhythm track, it adds shimmer and top-end movement without doubling the low-end content, which is exactly why it shows up so often in Nashville session work and on countless studio acoustic tracks.
Played solo, it can sound thin, since you’ve removed the low-end weight that a standard-tuned guitar provides. If you’re using it live rather than in the studio, pair it with a bassist or a second guitarist holding down standard tuning so the frequency range stays full. Used in isolation, it’s a texture tool, not a replacement for your main guitar sound.
Step 7: Maintain It Like a Different Instrument, Not a Variant of Your Regular Set
Because the gauges and tension profile differ so much from standard tuning, treat a Nashville-tuned guitar as carrying its own maintenance schedule rather than assuming it ages the same way your regular set does. Thinner strings under this kind of tension can show fatigue and tonal dulling faster than thicker strings would under standard tuning, simply because there’s less metal mass to begin with.
If you’re switching a single guitar back and forth between standard and Nashville tuning for different sessions, expect more frequent string changes than you’d tolerate on a guitar that stays in one tuning permanently. The repeated detuning and retuning cycles add wear that a guitar living in one tuning doesn’t experience.
Putting It Together
Nashville tuning rewards a little upfront planning and punishes shortcuts. Grab the right gauges, either from a dedicated set or pulled from a twelve-string pack, check your nut slots and relief before committing to pitch, and bring the strings up gradually rather than cranking them straight to target.
Related guides: Guitar String Gauge Guide, 12-String Guitar String Guide, and How String Gauge Relates to Guitar Scale Length.